Wednesday, 14 June 2017

Hanging Tea Towel tutorial

Simple Hanging Tea Towel Tutorial
(Previously featured on the The Village Haberdashery blog)
By Amy Cavanagh

Materials

  • 8" x 8.5" piece of linen fabric (or any fabric really - just be aware of pattern direction during assembly)
  • 8" x 8.5" piece of iron-on interfacing
  • One 2"piece of sew-in Velcro
  • 1 waffle weave (or linen or thin cotton) tea towel 
  • One AWESOME button (I used a ceramic button purchased at a craft fair many years ago and used embroidery floss to attach it)
Instructions
1.  Iron the interfacing onto the wrong side of your fabric.

2.  Crease fabric down the middle along the long side.

3.  Lay fabric flat and good side facing up.  Use a ruler and Hera marker (or chalk or some sort of marking device that can be removed), draw your 1/4" seam allowance along the long sides.  These will be used to help place the Velcro in the correct place.  See picture in Step 4 to see the scored lines.

4.  Now place your button on the right hand side 1.25" from the bottom and centred between the 1/4" line and the creased centre line.

5.  Place one part of the Velcro one inch from the top on the left side, centred between the 1/4" line and the crease in the middle.  Pin in place. 

6.  Place the other Velcro part 1.25" from the bottom on the left side and centred between the 1/4" line and the crease in the middle.  Pin in place.  Refer to the picture in Step 4.

7.  Sew both of your Velcro pieces on.

8.  Sew your button on.  I hand sewed mine on using embroidery floss because the button was ceramic.  Feel free to attach your button using your sewing machine.
Arrows show where I attached the two Velcro pieces and the button.

9.  Fold fabric in half along the crease in the middle so that the right sides are together.

10.  You will now sew two of the three open sides.  Please sew the long side and the short end where your button is.  Press.  Trim corners.

11.  Turn right side out and push the corners out and press again so this rectangle is flat, taking care to avoid the Velcro (it will melt!). (sorry this image is so blurry) 

12.  Take your tea towel and cut it down to 15" tall (or shorter if you prefer) so that three sides still have the original hem of the store-bought tea towel.

13.  Now we need to fold and manipulate the raw edge of the tea towel so it will insert into the fabric rectangle opening.  Here is a picture how I folded and creased mine but it all depends on the thickness of the towel and if you like uniform or irregular pleats or folds.

14.  Take the fabric rectangle and turn the raw edge inside about 1/4" to 1/2" and press.  Avoid the Velcro!

15.  Insert the folded towel top into the opening of the rectangle and pin in place.  Check the front and back to see that you are happy with the placement of the folds or pleats and how the towel hangs.  Adjust if necessary.

16.  Top stitch approximately 1/8" around the entire rectangle, locking the tea towel in place and giving a nice finish.  I did a double row of stitches where the tea towel is inserted into the fabric rectangle.

17.  Press and hang on the oven door or cupboard handle.  Step back and admire your work!


Friday, 10 July 2015

Q3 2015 FAL - goal setting

I love lists.  I write a list everyday so here is my overly ambitious Third Quarter list of things I would really love to complete:

1.  Fresh Lemon Quilts inspired Poinsettia  table topper - finish sewing together, baste, quilt, bind, label

2.  Arrows bee quilt - baste, quilt, bind, label

 3.  FIVE Michelle Pattern Grocery bags - all cut out and ready to sew since August 2014!!
Picture borrowed from Michelle Patterns

4.  Simply Solids Amaranth bee quilt - baste, quilt, bind, label

5.  HST Quilt - add another border (?), baste, quilt, bind, label

6.  Lizzy House Meadow quilt - baste, quilt bind, label

7.  Make a back, sandwich, baste, quilt, bind and label my Diamonds in Diamonds quilt

8.  Big Bear - add paws, border, backing, sandwich, baste, quilt, bind, label

9.  Finish my EPP Carnival project (Katy Jones pattern) from Fat Quarterly Retreat four years ago.  This will become a cushion I think. 


As you can see, I hope to turn some of these quilt tops in to REAL quilts!  Wish me luck!
Linking to:

2015 FAL at On the Windy Side

Saturday, 4 July 2015

Q2 2015 Finishes - two things completed

 2015 FAL at On the Windy Side

For various reasons, my 'sew-jo' abandoned me in September 2014 and has still not fully returned.  I have made several things (baby quilt and five brooches) in the past eight or nine months but only managed to complete TWO of the items on my Second Quarter Finish-Along list.  Here is the link to my original Q2 to-do list!

I completed my Polar Bear cushion (paper pieced pattern by Quiet Play) and I am thrilled with it!  I tested this pattern and the block sat for the longest time so I am pleased it is no longer an orphan!  And now I appear to be ready for Christmas - win win!


My other finish was a Sew Together Bag for Nathalie.  We did a 'talent/skill swap' - she made me the most gorgeous hand knit socks and I was to make her the Sew Together Bag.  However, I had made one before and swore to NEVER make another.... which could be why it took me a year and three months to complete!  But I gifted it full of things for Nathalie to enjoy.  I am pretty pleased at how it turned out - so much so that I may even make a third one in the future.... 


Nat's favourite colour is teal/aqua (also one of my favourites too!!) so I enjoyed picking the fabrics for it - and the zippers too!  And of course I sewed one of the THIS TOOK FOREVER tags inside -- because it was the truth!


I am all linked up to the 2015 Q2 Finishes linky party.


Saturday, 11 April 2015

Q2 FAL 2015 - goal setting

2015 FAL at On the Windy Side 


My 2nd Quarter 2015 Finish-Along goals are:

1. Hand quilt my Meadow Quilt


2. Finish Nathalie's Sew Together Bag


3. Finish the Giraffe and make it into a wall hanging

4. Complete my bag testing for Geta

5.  Make this polar bear into a cushion cover
 

6.  Handquilt my Diamond in Diamond quilt


Linking up to On the Windy Side


Wednesday, 8 April 2015

Mighty Mouse Pincushion tutorial

Hello - I thought that I would share my tutorial for MIGHTY MOUSE (pincushion) that was originally posted on The Daily Stitch in 2013. I LOVE making these mice.  Here is one I recently made in pink mirror ball fabric!  So cute!


Mighty Mouse [weighted] Pincushion

You will need:
(1) 6 inch charm square [I used Anna Maria Horner ‘Field Study – Spotted in the Crowd Amelia’]
(2) beads or buttons for eyes
(2) 1 inch x 2 inch  [approx – adjust to how big you want them to be] felt rectangles for ears
(1) 6.5” piece of cord (or yarn) for tail
Needle and black thread
Polyfil toy stuffing

Steps:
1. Fold square diagonally, right sides together to make a triangle.
1

2. Sew along one open edge using small stitches, backstitching at the beginning and the end.
OLYMPUS DIGITAL CAMERA

3. Clip corner near stitches and turn so right side out, making sure to use a pencil or chopstick to ensure a tidy point (the nose of the mouse).
3

4.  Trim off corner (you can trim right to the opposite edge if you want to make a better cone).
OLYMPUS DIGITAL CAMERA

5.  Press a hem around the open edge.
 OLYMPUS DIGITAL CAMERA

6.  Baste stitch along this hemmed edge using strong thread (or doubled up thread).
 OLYMPUS DIGITAL CAMERA

7.  Gather thread so the opening is cinched slightly and add stuffing, making sure it goes into pointed nose.
 7

8.  Cinch more and add stone if desired (helps keep the mouse upright on an angle).
 8

9.  Cinch closed and secure thread.  Sew tail to the bottom near the closure. Stitch felt over this area if you feel the cinched area is untidy or not closed tight.

10.  For the whiskers on the nose, thread three pieces of black thread through near the nose tip and tie each side with a knot close to the body to secure.

11.  Add beads or buttons for eyes.  French knots would work as well.

12.  For the ears, take the felt pieces and trim the corners off so you have semi-circular tops.  Pinch the bottom of one ear together so the ear has some dimension and stitch these gathers in place.  Now stitch to the body of mouse.  Repeat.
10

14.  Adjust the stone in the bottom to get the desired angle of your mouse.

15.  Now you have a weighted mouse pin cushion!!  Enjoy!

OLYMPUS DIGITAL CAMERA 

OLYMPUS DIGITAL CAMERA

Tuesday, 7 April 2015

Q1 2015 Finish Along - my results

2015 FAL at On the Windy Side

What?  The first quarter of 2015 is already complete!?  Wow - I guess it is time to get a move on!  My sewjo disappeared in September so it is a miracle that ANY sewing has taken place this quarter!  I listed 10 projects to complete and I only managed to complete two.

Aneela Hoey's Fold Over pouch - needed to interface, sew together and post to a lucky recipient!
Yay - I completed this project and posted it to Germany for my 500th Instagram follower gift. When it finally arrived to Germany, the recipient loved it!  Fab pattern too!


Tea Wallets (Patchwork Please) - I prepared fabric to sew ten but still needed to cut the interfacing, then adhere, add ribbon, sew together, add buttons and tea.  I managed to sew four and even gifted them at QuiltCon2015!  Here are just two of them as I forgot to get pictires of the others.


There was another item crossed off my ever-growing to-do list but I can't say that " I " finished it.  This was my Cherry Charm quilt that I needed to baste, quilt, bind and label.  Guess what?  I gave the quilt top to Pennie of Tuppence Ha'penny quilts for her to finish and give to someone special that needs a warm hug from a quilt.  It is now her WiP! 


There you have it - 2/10 (well... 3/10) isn't too bad all considering!

Linking up to On The Windy Side 


Monday, 2 March 2015

Destash -- part 2

Hello again!!

Thank you to everyone who has sent get well wishes to Jax.  He is now home but still not 100%.  He has been picking at some boiled chicken and plain rice and drinking water so at least he is (hopefully) on the mend.  A week of prescribed antibiotics should help too.  Fingers crossed he improves each day. #ilovemydog

I am continuing my destash!  Please let me know in the comments if there is something here that you would like to buy.  I will reply to you and give you my Paypal address for you to Friends & Family paypal me.  Happy shopping!

Here we go: 
Pearl Bracelets - LIGHT BLUE 
£2.90 plus 61p UK postage

Image result for pearl bracelet blue fabric

Pearl Bracelets ELECTRIC BLUE - Fat quarters - 2 available
£2.90 each plus 61p UK postage each
 Image result for pearl bracelet fabric

Pezzy Prints BLUE/AQUA - Half metre
£4.50 plus 80p UK postage

Pezzy Prints NAVY - Half metre
£4.50 plus 80p postage

Pearl Bracelets NAVY - Fat quarters - 2 available
£2.90 each plus 61p UK postage each

Pearl Bracelets Aqua-like BLUE - Fat quarter
£2.90 plus 61p UK postage 

Oops-A-Daisy by Keiki for Moda - 1 yard
£7.50 plus £1.06 UK postage


Thank you for looking!!  I am happy to post internationally too - just leave a comment WHERE in the world you are and I will get back to you with postage costs.


Sunday, 1 March 2015

Destashing (for Jax's vet bill)

In September, I started a challenge to myself and called it #amysMinimalistChallenge.  I set a goal of ten things to do and they ranged from clearing out the coat and shoe closet, getting the garden in order and parting with fabric in my stash that I will probably never use or have fallen out of love with.

Today I am continuing that challenge and having another clear out because poor little Jax went to the vet yesterday and spent the night on an intravenous drip to get him rehydrated and his glucose levels back up.  I just spoke with the vet and he needs to stay in another night.  I hate to see him so poorly and I myself nearly fainted when I saw the £ bill and there is no way I will be able to afford it unless I do a destash!

If you are interested in anything listed below, please let me know in the comments and I will get back to you ASAP.  I am open to offers as well!  For payment, please "Friends & Family Paypal" me - I will give you my Paypal address in my reply.

If you are not in the UK and are interested, let me know and I can let you know postage to another country.

Here are the items I hope to sell:

Birch Avalon by Jay-Cyn ORGANIC - Half metre with selvage
£4 plus 61p UK postage
Avalon Squares - Avalon - Jay-Cyn for Birch Organic Fabrics

 GeoGrand by Daisy Janie - 5 ORGANIC fat quarters
£14 plus £1.06 UK postage

GeoGrand by Daisy Janie - 1 metre of ORGANIC Ogee
£9.00 plus £1.06 UK postage


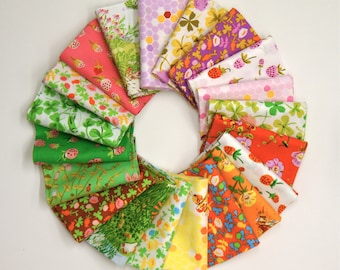
Briar Rose by Heather Ross - 20 fat quarters
£54 plus £2.90 UK postage
 https://img1.etsystatic.com/018/0/5311991/il_340x270.506086115_e2w8.jpg 

Dear Stella Purple Dot - Half yard piece with selvage
SOLD £4 plus 61p UK postage

Geisha in Bliss by Pat Bravo Indie Collection ART GALLERY FABRICS - one 1.5 metre piece with selvage writing!
SOLD £12 plus 1.06 UK postage

Timeless Treasures Sketch - Half yard with selvage (coordinates perfectly with the Geisha fabric shown above - just sayin') 
SOLD £4 plus 61p UK postage


More later folks!!!!  Thanks for looking!